
Fast-Track pyRevit System™

Lesson 10
Refine tool with more features
Written Summary
Refine Your Tool: UI Form, Table Reports & Clickable Links 🔧
Hey, welcome back — so glad you're still here. We've made our first tool, it's already useful, and most tutorials would stop right here. But let's be honest: nobody's going to open your code to adjust the renaming rules. So in this lesson we'll keep working on NameSwapper — we'll add a UI form, much better reporting, and clean up the code along the way.
Quick disclaimer: I won't go deep into Python or Revit API basics right now — that's the goal of the Kickstart pyRevit Automation course. But I still want you to see what happens after the proof of concept. We'll use AI for most of it, so it's more fun and you can follow along. And if you're an absolute beginner and the code feels hard — that's okay. Just watch how a tool evolves to its final stage.
Add a UI form with FlexForm
First problem to solve: right now the renaming rules live inside the code. We need a form. For that, we'll use FlexForm from the rpw forms that ship with pyRevit — go check the rpw FlexForm docs, there's a code sample you can copy and it just works.
The way it works is simple: you create a list of components — Label, TextBox, ComboBox, CheckBox, Separator, Button, whatever you want — and that stack becomes your form. Then you show it and read back the values the user typed in.
🖼️ [IMAGE: rpw FlexForm docs side by side with the rendered form — Label, ComboBox, TextBox, CheckBox, Separator, Button each highlighted in code and in the UI]
To make it even simpler, let's use Cursor. Select the part of the code where we define the rules, hit Ctrl+K, and type:
"Can you turn it into an rpw FlexForm?"
💡 Tip: Be specific in your prompt. My first vague attempt ("turn it into a friendly UI form") went in the wrong direction, so I cancelled it and named the exact thing I wanted. Naming the library makes a huge difference.
The AI writes the imports, the components, the form. It looks like a lot of code — but UI code is always like that, because you have to define every component. After a bit of cleanup (multi-cursor delete, values = form.values so we don't repeat ourselves, and Tab to accept the AI suggestions), it looks like this:
The values come back as a dictionary, so we read each rule by the name we gave its TextBox. That's it.
Test the form
Let's go and test it in Revit:
Click the NameSwapper button.
Select a few views — doesn't matter which, just pick randomly.
The form pops up. Try something real: put a single space in Find and leave Replace empty — that strips all spaces.
Click OK.
And look at that — Block 35 becomes Block35, and so on. Search the views by a prefix and you'll see they all renamed. Now we have control without touching the code. Great, so far not bad.
🖼️ [IMAGE: NameSwapper FlexForm open in Revit with Prefix/Find/Replace/Suffix fields filled in, views visible in the background]
One small thing: I spotted a leftover print statement from earlier firing before the form — go back and remove it. Little cleanups like that count too.
Wrap it in a function
The tool works, but look at the code — that form block is a bit too much sitting in the main flow. Select it, Ctrl+K, and ask:
"Can you make it a function and use it?"
Then tidy it up: move the function into a functions section, move the imports up to the imports, and add a short description.
The function returns four values, so we assign all four rules in one clean line. I also like defining the variables first and then returning them — much cleaner to read than one giant return statement.
💡 Tip: Those big ASCII section headers (IMPORTS, FUNCTIONS, MAIN) I use? They're made with the Figlet plugin. Pure cosmetics, but they keep longer scripts readable.
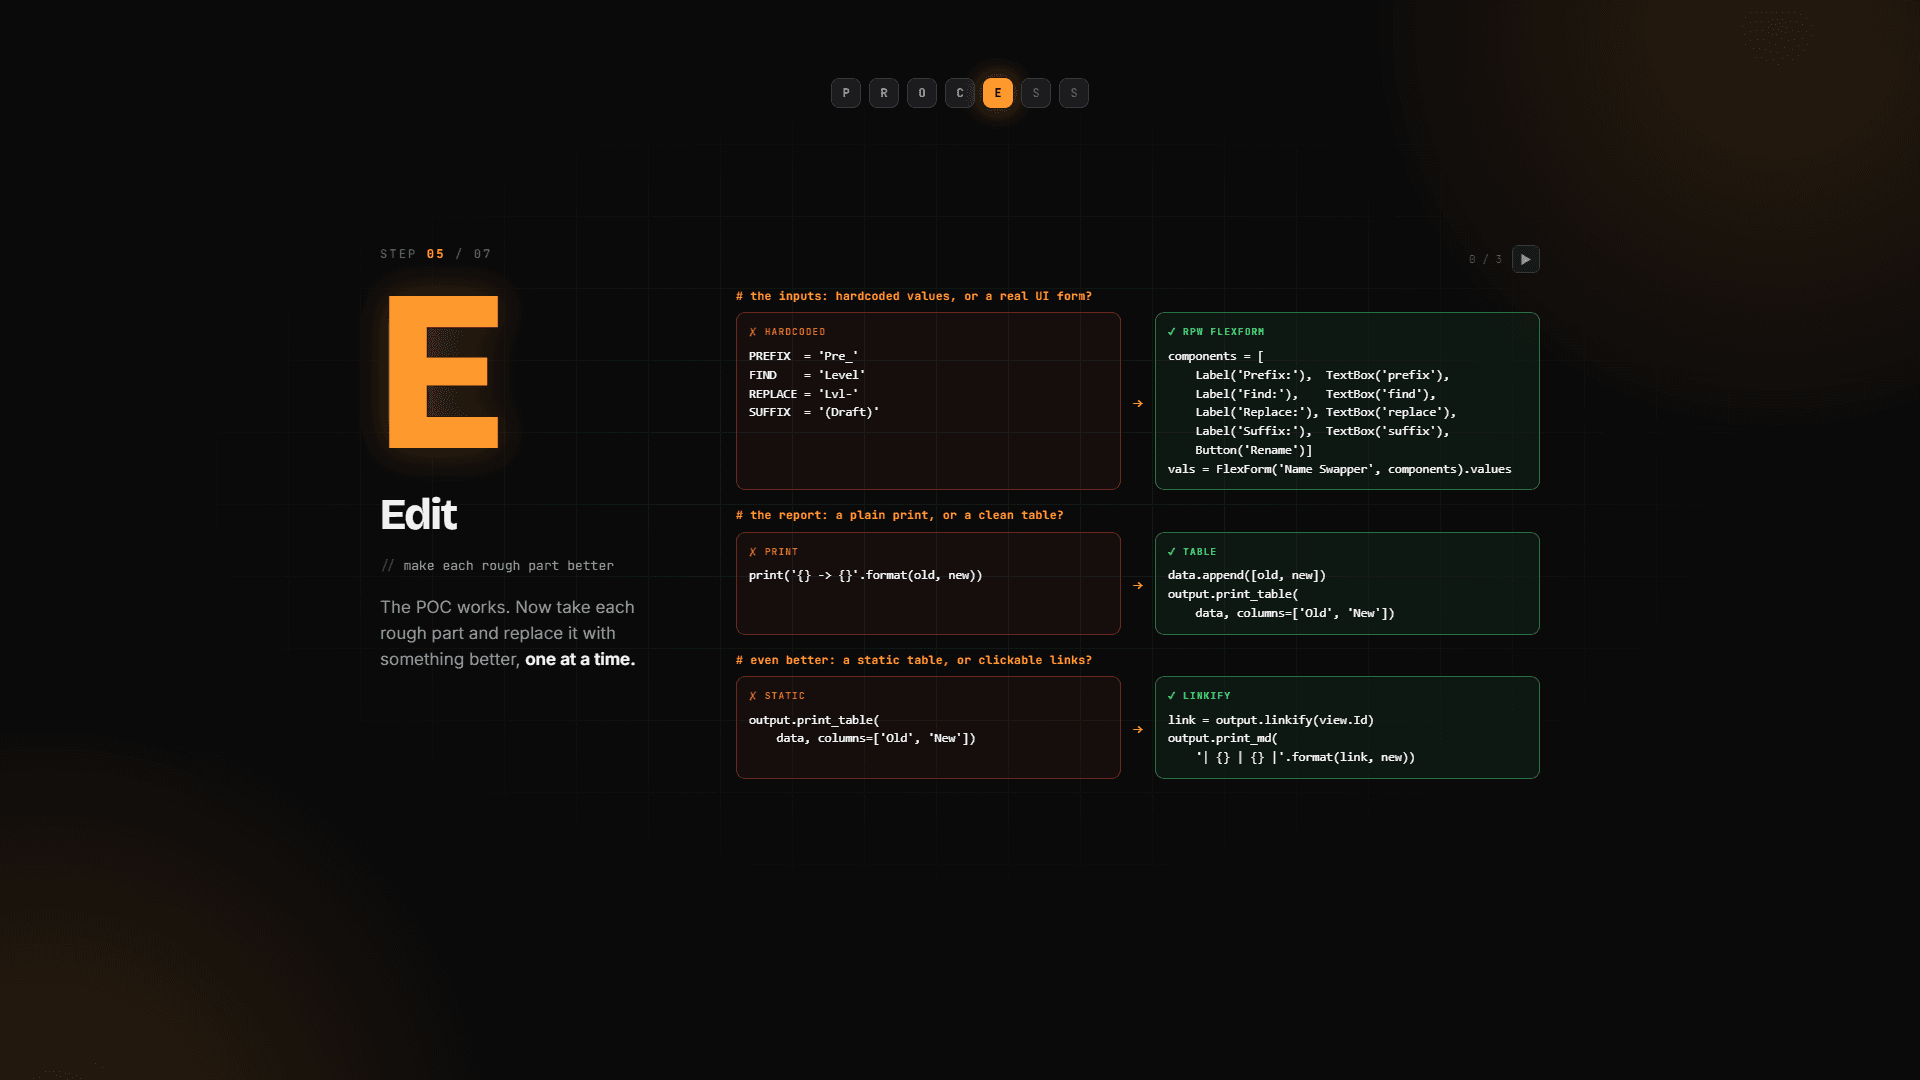
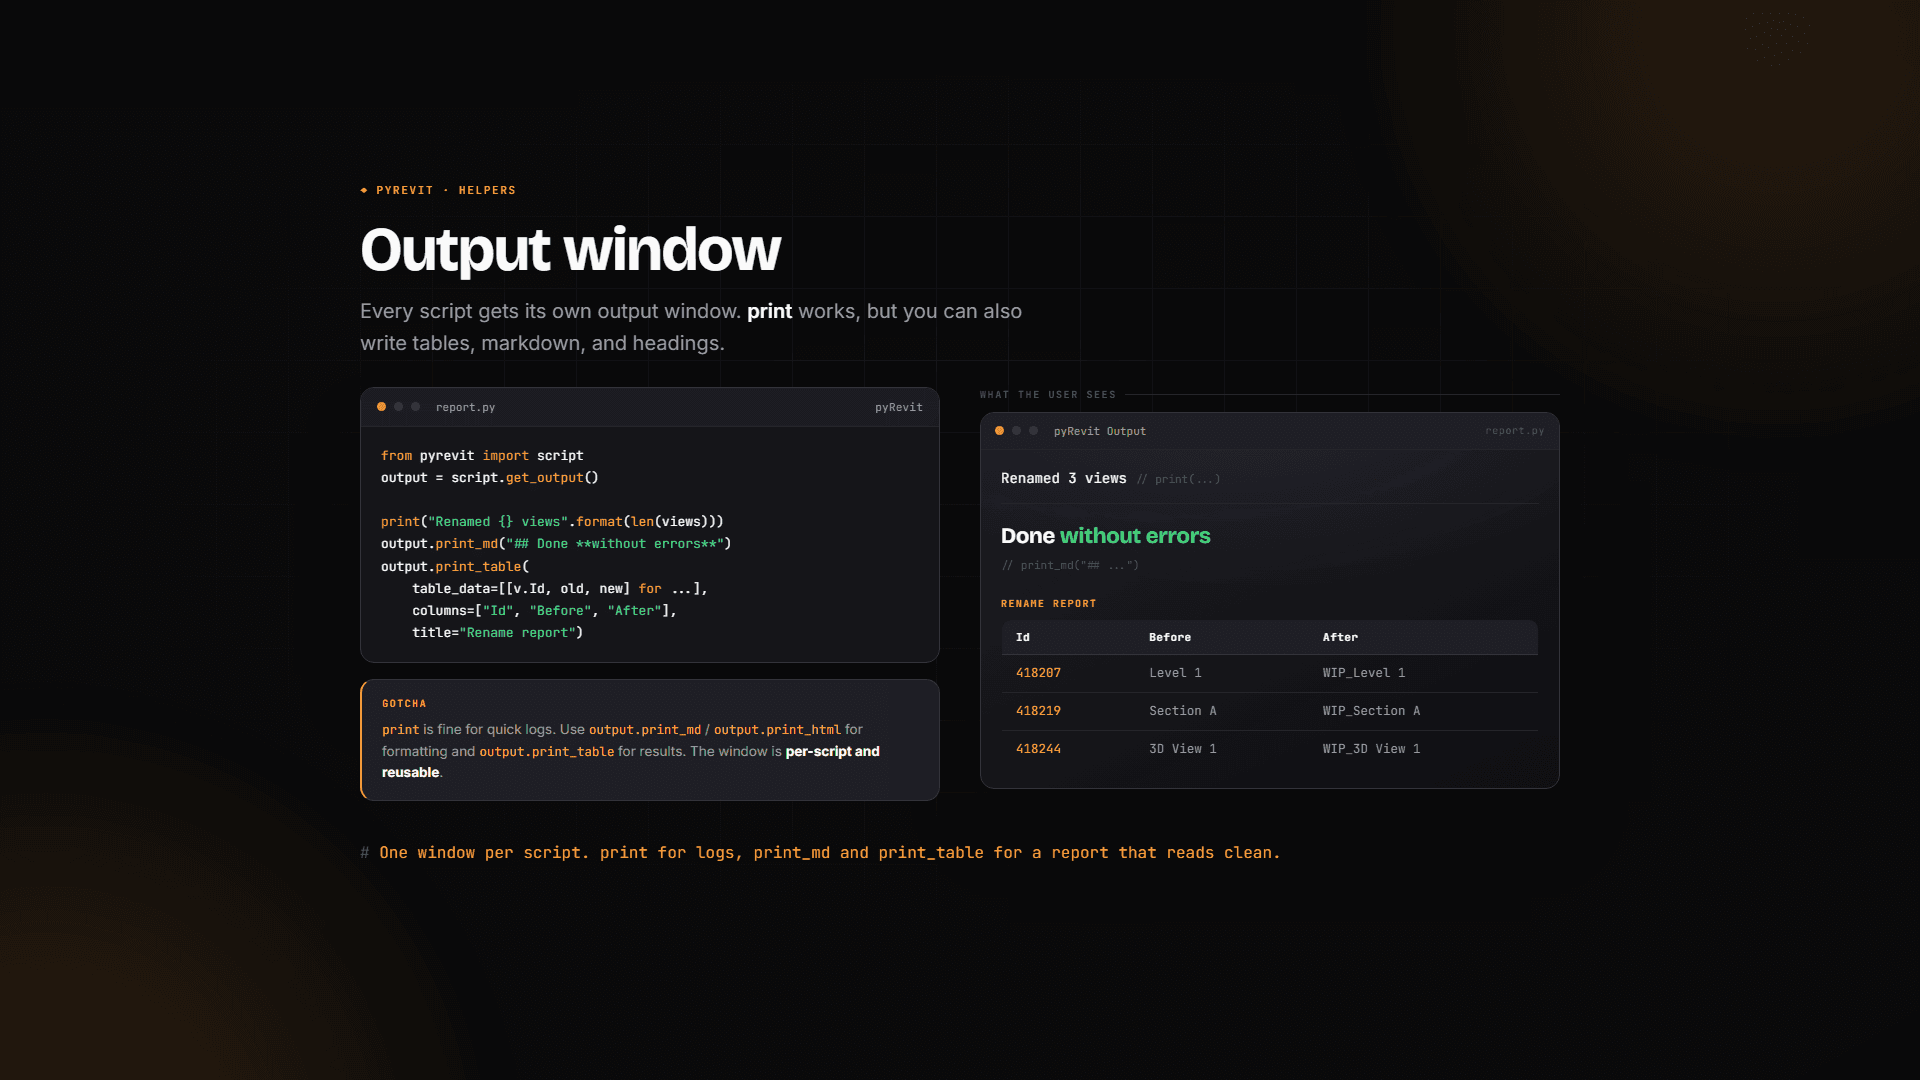
Turn boring prints into a table
Let's run it again — select some views, replace building with something else. It works... but the output is quite boring. Let's fix the reporting.
The trick with tables: you gather the data inside the loop, then print it all together after the loop. Select the reporting part, Ctrl+K:
"Can you change the report into a print_table output?"
Instead of printing each rename, we now append rows to a list and print one table at the end:
Test it: rename your camera views to device and look at that — instead of a wall of prints, you get a proper table. Original name, new name. Super nice. I like that.
Add clickable "Open view" links
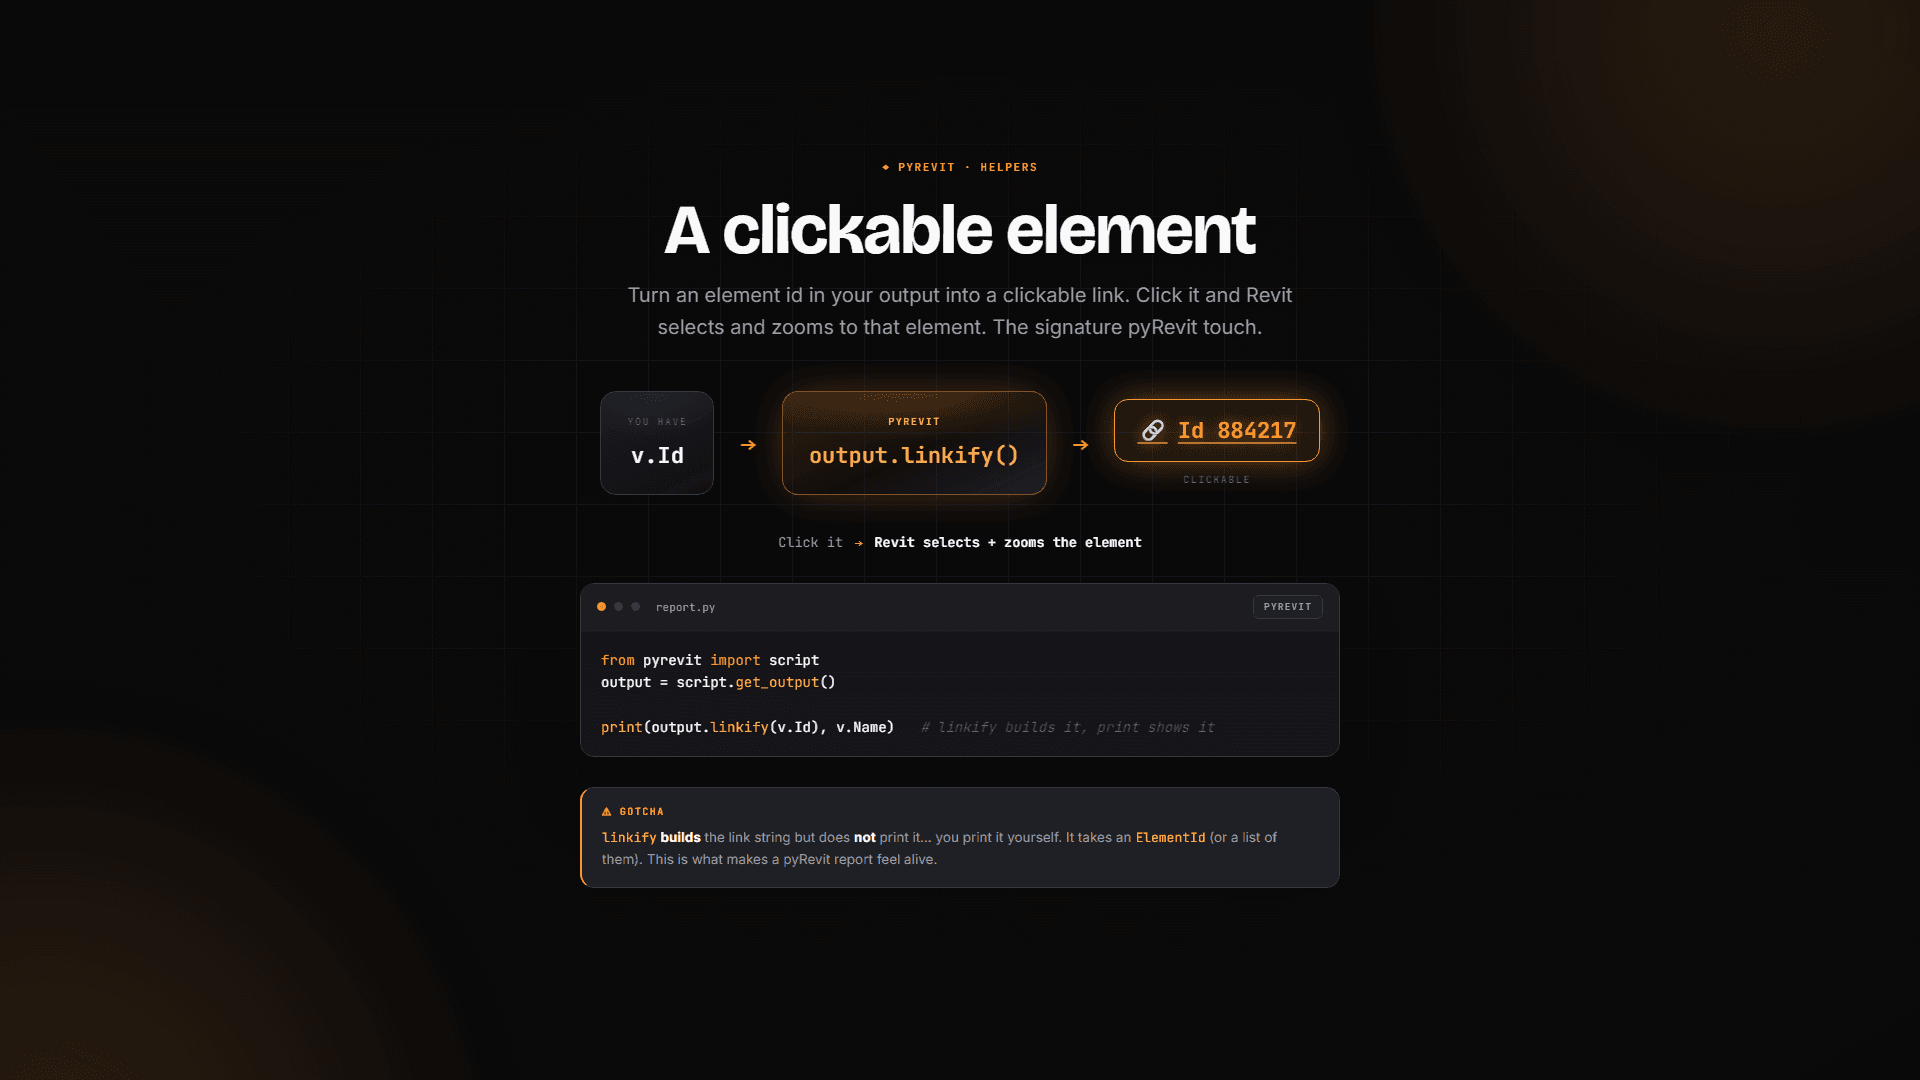
We're not done yet. Let's select the whole thing again, Ctrl+K:
"Can you make a linkify button inside the table saying open view and its name?"
The AI makes the changes (plus a bunch of comments — clean those up). But when we run it: module has no attribute 'linkify' on line 87. The AI hallucinated a bit here — it tried calling linkify on the wrong thing, when we already had output defined right there from script.get_output(). Grab that and use it:
And add the new column:
⚠️ Important: AI will confidently invent methods that don't exist. When you hit an
AttributeError, check what's already defined in your script before assuming you need something new.
While we're here, let's also clear the pre-filled default values out of the form's TextBoxes — we don't need them anymore.
When Revit crashes (yes, it happens)
Next test run... and I crashed my Revit. Very good for the demo! I'm leaving it in so you see it sometimes happens. Usually you just get an error saying something didn't work — an actual crash is rare. But either way: don't panic, investigate.
In your case, you'd copy the code into Claude Code or another smart model and ask for feedback. We know it broke right after adding linkify, so that's the suspect. And sure enough: linkify wants the view ID first, then the label — the argument order was flipped.
I also noticed my Revit API autocomplete wasn't working — I had moved folders around and broke the paths to my stubs. Quick fix: in Cursor, select your Python interpreter again and point it at the right version. Bonus: with the stubs applied, the AI gets more Revit API context, which makes its suggestions smarter too.
Run it once more: select views, add a prefix... it instantly works. Click Open in the table and the view opens. One last polish — the view names are already in the table, so the link doesn't need to repeat them. Just "Open" is enough.
You decide when it's done
Here's the honest truth: we could've stopped much earlier. Maybe you don't want linkify. Maybe you don't need fancy reporting. You always decide yourself when the tool is ready — I'm just showing you that you can keep pushing forever, adding feature after feature.
For this one? The main functionality is solid, the form works, the report is clean. I'm happy with that. Don't overthink it.
So: we started with an idea, built a quick proof of concept, and now we've grown it into a real tool with a UI, a table report, and clickable links. It's starting to look ready to share... but not so fast.
What's next
Whenever you think your tool is ready, it's time for a stress test — we're going to break it in every way possible so we can fix it before anyone else gets the chance. That's exactly what we'll do in the next lesson. See you soon! 🚀